Wednesday, May 27, 2009

Fast Forward...

Now, fast forwarding through the wall preparation. My studio wall was spackled and sanded until as smooth as possible. I may need to go back and touch up areas when the room is under final renovation.

The wall was then primed with my favorite primer for old plaster walls. KILZ HIGH BUILD is an amazing product. I do not spray it on because I do not want it on quite that thick, but it can be applied that way for a level 5 finish, so I've heard! I simply roll it on using a smooth roller which covers the wall just enough to fill in small imperfections and discolorations and gives it that extra smooth appearance. I think of it as putting on the foundation before applying the blush!

Then it was painted a beautiful color called "Silvery Moonlight"

You might also think of this wall as a 72 yr old grandma who just had a major face-lift! I think the other walls in my studio are jealous, take a look! What can I say, I'm good at what I do...


The piece of tape is marking the height of my mannequin which is 6ft, but she may adjust. We have to wait and find out.

Studio Under Construction Pt. 2

After all the loose plaster was knocked out, and loose plaster vaccumed out of the gaping wide space with a shop vac, the joints were ready to be repaired.

To repair a damaged joint seam this large, Please DO NOT attempt to just slop in some mud and call it a day.

For this type of repair it is crucial that you create a new secure joint between the ceiling and the wall.

I have found the best way, and possibly the only way to do this is to use drywall tape created just for that purpose of joining two pieces of drywall together using sheetrock.

My method is to apply a skim coat of mud to a long strip of drywall tape. Then, carefully line up the seam and smooth into place using a putty knife, making sure all the air bubbles and creases are smooth. Then, once the tape is secured in place, I neatly apply a generous amount of mud over the tape, smoothing it out and shaping it until the seam is completely covered. I continue to do this all along the ceiling, each time lining up the seams, and coating with mud until all the damaged areas are covered. I allow this to dry generally 24-48 hours.


The result will be an extremly rock solid new joint seam ready to be sanded smooth. (Beware, there is a lot of dust when sanding this amount of sheetrock.)

After sanding the joint seams, you may notice a few small holes here or there. Simply fill those in carefully with spackling compound and allow to dry.

When everything is dry and sanded smooth, you've created a brand new joint seam!

To be continued...

My Studio Under Construction!

I'm very pleased that my studio is coming along! It has come a very long way infact. The wall I have been using for photographing my vintage boutique items was in need of some serious help...and some love. Roof damage before our new roof was installed had caused the plaster joint along the ceiling to crack, which meant lots of crumbly loose plaster beneath. As a result, over 1lb of loose plaster had to be torn out to correct the obvious sag. (We now suspect there may be quite a bit of damage to the attic floorboards right near the attic entry.) This is also the area where the chimney meets the house, so whatever that means for the chimney, we'll have to find out.

We literally saved this house when we bought it and put a new roof on it. It is now a far cry from becoming ruins. The original plaster walls are in remarkable condition with all things considered. This house has enormous amounts of life in it and will make a beautiful recovery...

This reminds me that the whole back of our house addition will need a lot of work to secure the foundation. (Unfortunately we discovered that portions of the masonry footers are crumbling due of course the gravity x the weight of the structure, thus a 3" decline.) This is a big masonry job we have scheduled within the next couple of months. I'll talk about that later...my head is already spinning.

Anyhow, luckily I knew how to make this joint seam repair fairly simply and hope that with the new roof in place, we no longer will see so much plaster movement.

The most nerve wracking part is chiseling out the loose plaster. You don't know how much is going to go...so this time, about 3" into the ceiling, the plaster just went.


To be continued...

Sunday, May 17, 2009

hessler street fair

Liam and I love living in the heights because as a young couple, there's always a ton of fun stuff going on. We go to Little Italy almost once a week. We go to shows, as often as we can. The Hessler street fair marks the beginning of a string of festivals, fairs, parades that go on all summer long. We're always minutes from fun stuff to do. We're still working on getting our friends to make the drive out. Rain or shine, Liam and I always have a fun time though!

We took my mom, her husband and my sister Christy, and my 2 nieces and my nephew yesterday, so that was pretty cool.

They came to visit the house and see the progress we've made. I think they really like the house.

Here are some photos. I didn't get any of Christy and the kids, or my mom or Ron. I always forget those things.

I forgot to take a picture of my birdhouse I bought too! There was a little woodworking guy who was quite talented and he said he might start selling on Etsy. I bought a little white birdhouse for our yard that I love. I'm going to make a habit of getting special little things like that when we go on little travels and such because those little things will really make our house a home.


Friday, May 15, 2009

1 a.m. triple stipple whipple

This is how we do it. We're bringing back the late night force of labor- 3 a.m. runs to giant eagle, literally gun-ho until we pass out across the stair banister or develop a really bad case of the midnight munchies...we have a backstock of Ramen on hand.

Thank god, we're young. Yeah, we were whining like...we're getting too old for this.

Poor poor Liam looked like he was going to really pass out, so I only made him wipe off the mud from around the edges of the wall and ceiling while I stippled. We had gone to a show the night before, so we were both running on little sleep.

So, as it went, we were able to stipple the ceiling up until the area over the staircase, which we will finish tonight. We did not want to risk working that close to the staircase in our condition.


the new light fixture we had installed in November was tricky to work with. It's all one unit, so only the globe would come off and the rest of it is hanging by the wires. We duct taped it up there and wrapped around some masking tape to help keep off the mud, but I can already see that it'll need to be cleaned up considerably. I still don't know how I'm going to paint around it, but I'll figure something out.

Wednesday, May 13, 2009

sneak peek: before and afters

Now, everything is obviously not finished, but this is a preview of everything after it has been spackled, sanded, repaired, and primed.

1930s Linen Cabinet:

(interior)


(exterior)


Now, the faces of the drawers will possibly undergo a final sanding with ultra fine, and then one additional coat of primer. When everything is finished, you will never know they were victim to seriously peeling paint. The goal here is just to simply have a nice white linen cabinet with original silver pulls. (those are already cleaned up, and paint free...they will be cleaned with some Tarn-X shortly.)

Hallway:


The hallway has come a long way in only one week. I've been working relentlessly, and have neglected by business for over two weeks as a result, but the work is paying off. I'm pushing record renovation speed!

We have so much to do with our spring/summer months, that there is no time to lose whatsoever. Spring has just begun and I'm already feeling that the clock is ticking to tackle a very long list of projects that MUST be finished before the cold returns. (insulation, weatherstripping, porch sealing, new storm doors, vinyl siding repairs, garage repairs, masonry, construction, repair repair repair...the list goes on and on.) I'm not sure how it's all going to get done in under 5 months, and with our tight budget but you better believe, it will...if it means I work from 6 a.m. to midnight every night laying it down like bricks, in sweat and blood and my hair falling out in chunks, everything WILL BE DONE.

Tuesday, May 12, 2009

Hallway Day 7


A lot more priming was completed today. I'm very tired. The cabinet in the hallway looks really great so far. It will undergo several more treatments before being finished. I have not primed the interior yet. That is next. The hardware I stripped right on the doors came out very nicely. there was no need to remove them, but it will just be a little bit tricky to paint around. The hinges are shiny and golden. The rest of the hardware on the cabinet is silver, but that doesn't bother me. Everything will be really shiny and brand new when it's all done.

I just need Liam to help me cover some areas with primer that I could not reach safely by myself, but everything else has received one coat of primer. Several areas will need an additional coat.

Hallway: Day 6 PRIME TIME


We're priming again and this is my favorite part...although it's just as physically draining as the sanding process. It's a very tedious job and requires many many hours-usually a couple days for me to complete. I love seeing the blotchy walls and trims become a brand new clean white canvas on which to paint.

I am using KILZ HIGH BUILD in water base. It is excellent and really helps to give old plaster walls the smoothest finish they can achieve. I'm amazed at just how smooth our old walls come out. You have to remember that most of the plaster in this house is more that 45 years old, if not original to the house and have also undergone considerable mistreatment in the past 5 years or so. So, this renovation isn't merely about throwing paint back on the old walls...each wall is being carefully restored one by one before being repainted.

Old plaster just adds a considerable amount of warmth and character to a home. It's energy efficient. It's also mold resistent and even though water damage can cause it to crumble, it won't ever mold, or rot and can almost always be repaired with a skillful hand. It's really incredible how this stuff was made and how it was expertly installed. Plaster can really stand the test of time, and can last pretty much forever if it is treated with respect.


"Mommy's seepin, mosey."
"cos so i culd do dis."


Saturday, May 9, 2009

Hallway: Day 5


Today is Saturday and Liam had to work, but I tried to get a few things done. The sanding always feels like it will never end. I was pleasantly surprised however that the hallway did not need as much sanding as the master bedroom or what is needed for the other two bedrooms. The plaster in the hallway was in pretty good shape. I didn't have to repair very many ceiling seams or joint seams. The worst part of it is over. The cabinet is now fully repaired and will make an excellent recovery. This is awesome for only 5 days into the project. I'm very proud.

Today was spent taking care of the remainder of the sanding and beginning to strip the cabinet hardware. This is the fun stuff. The hinges will be the hardest part. I've tried to strip them without removing them for sake that re-hanging the doors may be tricky, but I may have to ultimately remove them to further clean them. They probably have at least 35 years of paint on them. It's coming off like glue.

The drawer pulls were already previously removed and are cleaning up fairly easily. They are actually silver and I think they will look good as new with some tarnish remover.

The recovery of this cabinet is really exciting. Although, we'll never see the gleaming hardwood and lacquer of yesteryear, I think it will look the best it has in over three decades in just under a weeks worth of labor.

Here are some photos of my stripping projects. Again, I'm using Multi-Strip Pro which I highly recommend.

I think the drawer pulls look like perogies now that they are being stripped, but that's just me...maybe I'm hungry.

Thursday, May 7, 2009

Hallway Day 4


Today was rough. There was so much dust, it went straight through my mask. I had sheetrock up my nose, and blood. I had so much dust in my lungs, I thought for a minute I wasn't going to make it, but I'm okay now. I don't think there's much worse than scraping hard sheeetrock out of your own nose. I still have it in my ears, I'm sure. It was like I had fallen in a vat of cocain with my bloody nose and all.

I finished sanding the interior of the closet for the most part. The patch we did came out really nice. Once it is primed and painted, you'll never know there was a gaping hole there.

When Liam comes home he's going to help me sand and patch some really high areas in the hallway that I couldn't reach without severely injuring myself.

I'm going to be going over the final sanding and spackling tomorrow. There is only very minor stuff left now. It's only day 4, and although I almost went into an asthmatic fit, I may actually finish this hallway in half the time I had intended!

Saturday, while Liam has to work, I will hopefully be priming everything. Sunday, if I have any strength, I will stipple the ceiling. Then it will be a few days out to let that dry, and pick out a paint color, which will be a neutral beige.

Wednesday, May 6, 2009

Hallway Days 2 & 3

I'm emotionally, and physically drained by day 3. It's taken me one day to get a hold of myself again today, and by get a hold of myself, I mean completely lose myself in weary and sleep.

Progress has been made.

Day 2: (Monday)

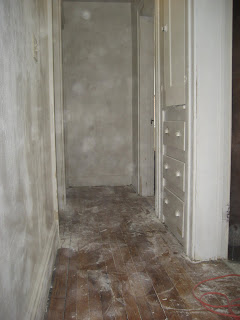
I worked a 6 hour day of sanding... Sanding every base board, every wall joint, every door frame. One of the big issues we've faced in our renovation of this house is chipping paint. Almost every inch of this house is covered in a very thin one coat of cheap white paint that pretty much peels off everything like paper in sheets or peels like latex skin. Anyway, during the day on Monday I really accomplished almost all if not most of the sanding necessary. There was so much dust in the air, during the photos I took, it's actually visable hanging in the air, but yes I was wearing a face mask. I was covered from head to toe in white dust.


Day 3: (Tuesday)

On Tuesday, I removed the paint covered pulls from the hallway linen cabinet. I plan to strip them. They are not solid brass as I had thought, because the original doorknobs and other hardware in the house are brass. However, I think I was right about it being 1930s-great depression era. I think that it was crafted by hand by the man who lived here by using scrap wood and salvaged hardware. It was rough times. People could no longer afford custom built ins and shiny metals. So, the pulls will be cleaned up and we'll see how they come out with some tarnish remover. I may coat them with a silver coating if they need it.

After removing the pulls I chipped off peeling paint and then removed each drawer one by one, sanding the face and each side of the drawers smooth with coarse sandpaper.

It was interesting to peer inside under the tub. It was spooky. I saw some k&t wiring under there! I also saw where the old clawfoot would have been hooked up. The newer plumbing is a good foot off to the left from where the old tub sat. I really wish it was still there.

The last thing I did on Tuesday was go back around the walls and putty any areas that I missed, marking x's where I still need to sand or fill in, and I used some wood putty on the face of the cabinet and base molding to fill in little impressions and scratches in the wood.

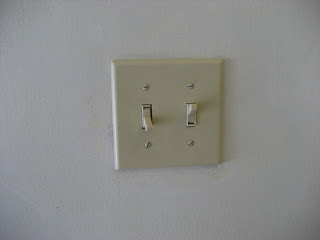
I forgot to mention on Monday, that I had removed a buch of paint from the switches and switch plate in the hallway. They came out very good.

Here is the hallway yesterday:(I know it looks wild right now, but it's going to be pretty in a few days.)