Wednesday, February 24, 2010

Broom Closet Repair

The side entrance, again is one of our challenging cosmetic renovations. In 2008, we removed red and green plastic tiles and molding asbestos mastic.

So far in 2010, we've conquered the basement steps from hell, and now we've overcome the slasher pepto bismol broom closet.

Here are some photos from the closet repair.


Friday, February 19, 2010

Stair Treads

I ordered these stair treads for $14.95 from Amazon. They came in a pack of 7, which is just what we needed. They work great for this type of application. We simply needed something that would prevent slipping, hide dirt and footprints, and look nice at the same time. These are machine washable. Let's see if they can hold up to four cats, and the amount of debris from our projects.

They are already being put to the test.

Exhibit A


Finished Steps


Before:


"Who would have thought that a 90 pound female armed with only a hair dryer in one hand and a paintbrush in the other could have conquered the steps from hell? Now, you know."

-Phil

Wednesday, February 10, 2010

Basement Steps Makeover

Projects at the house have slowed down since Christmas. It's been difficult to get the ball rolling again. I was sick over the last couple of weeks, and managed to fracture a rib while coughing...Well, I'm gradually feeling better and hope to accomplish some things on the winter project list again soon!

We've faced some really tough cosmetic challenges in renovating this house, one of them being these basement steps. I've wanted to tackle them for a long time, but could not get away from my other projects. Finally, we've made a huge difference in their appearance.
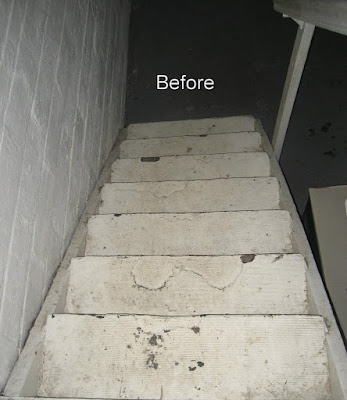
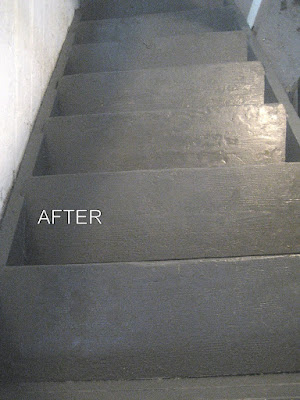
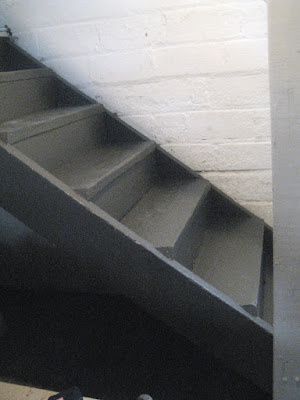


How We Did It:

1. removed disintegrating, and peeling rubber stair treads. (they had been painted white and had gum stuck to them, and were covered in grime.) using a crowbar, and a hairdryer to soften the mastic glue.

2. stripped black mastic glue using Bean-e-doo mastic remover which I was able to get at a pretty good discount from a seller on eBay. Great product, not reccomended for wood, but it did do the job without hazardous chemicals which was a concern for us, as we have four cats.

3. Stairs scrubbed & cleaned with soap and water

4. Wood puttied where it was necessary. Allowed that to dry.

5. Sanded wood putty, & lightly sanded peeling paint & rough surfaces. (avoid breathing lead dust.)

6. applied Zinsser Peel Stop to peeling paint and rough surfaces.

7. Applied 1 coat of Kilz Casual Colors One Coat Paint (Dark Umber)

Allow that to dry and apply one more coat where necessary.

In a few days the stairs will be finished and dry enough to install some pretty carpet stair treads which I ordered from Amazon.com

Wednesday, December 16, 2009

Updated Side Entry!

1. New custom colonial storm door.
2. Vinyl siding repaired!
3. New light fixture to match!
4. New doorbell! ding-dong!

Merry Christmas to us from us!


BEFORE:

WOW!!!!!


In the spring, the side entry exterior will receive the finishing cosmetic fixes which will include total restoration of the entry door and hardware. It will be painted deep red to match the 2nd floor patio door.

Breakfast Room Updates

The chandelier is in!... as well as the new switch to turn it on.

What goes through one's tiny mind when they haphazardly install a large room ceiling fan in a very tiny room with a low slanting ceiling? When did it become logical to use electrical tape in place of a wire nut?

I need Robert Ben Garant to take notes on this project while wearing a monkey suit.

How many monkeys does it take to screw in a lightbulb? : I don't know sir, we don't have enough information yet!

WELL, I NEED ANSWERS!....


"Quick, how many monkey's have you seen today?!"

"Sir, with all due respect sir, I don't understand the question!"


Okay, moving on to the window casing. As you can see there has been progress! We'll be back soon with photos of the apron installation.

BEFORE:

Wednesday, November 11, 2009

That's What It's All About!

PREPARE TO BE BLOWN AWAY! I've done my best to create a slideshow here to showcase the renovation of the rear addition (what we are calling the cardroom & breakfast room/eat-in-kitchen respectively.)

Photos dating all the way from August 2008 to today. The original inspiration, and the scope of the work that has been done in the past three months.

We faced carpenter ant infestation, carpenter ant damage, water damage, damaged joint seams, dry rot, rot, electrical boxes consumed by rust and everything in between. There was more work completed solely by Liam and myself than we were able to document on camera.


Work is still going on, but we are finally entering into the final stages.

UP NEXT...Window casing is about to go into place. New light fixtures, and some electrical changes will be made. New baseboards will be installed, as well as new pantry door. Additional painting of course, and some cosmetic fixes for cold air return and vents. It is a masterpiece for which we are extremely proud!

A gem of a property!

Now the ball is really rolling. We've just replaced the front storm door which was missing hardware to close and had a whacky glass storm panel insert which was leaking out all sorts of hot air and leaking in all sorts of cold air. The exterior entry door we have inside the sunporch has a 1" gap beneath it from when previous owners planed the door down to accomodate carpeting. It also has a lot of glass, so without a proper storm door, we were in for a big draft.

I will get to that entry door next spring. It will be stripped, refinished, re-weatherstripped, etc.


Anyway, we finally had our custom Anderson storm door installed. This is an Anderson 2000 series with a 79" height. (All our entry doors are 79" tall) Full glass with slide away screen. It looks lovely on the house. We already feel the energy savings! AND Now the kitties can enjoy going out on the sunporch when the weather is not too cold.

COMING UP FOR EXTERIOR...
Mailbox and address sign will see updates soon...
Side entry door will be worked on by Barry...re-glazed, new lock, new trim, and new storm door with cross panels will be installed shortly, and a new light fixture.